It’s never too early to start thinking about Christmas, especially with it being the season that so many of us crafters favour to create for!
So for my new visitors I thought I’d share this stocking tutorial I made a couple of years ago when I guest-posted for my gorgeous friend, Kerryanne over at the Shabby Art Boutique.
With its vintage, shabbilicious charm, I think this stocking is suitable for us grown up kids as well as the littlies!
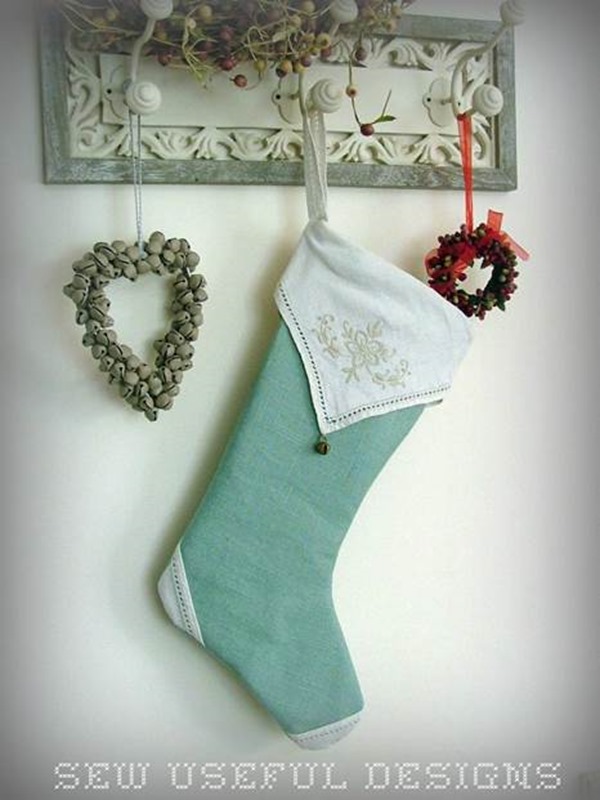
This provincial Christmas stocking takes just a couple of hours to whip-up, and if you have more time to spare I have included some ideas for embellishment a bit later on!
The completed stocking measures 23 in (58cm) from hanger to toe.
You will need:
Half a yard (50cm) duck-egg blue linen
One vintage napkin measuring approx. 11½ins (29cm) square
10in (25cm) heavy-weight dense batting
Two rustic metal bells
Sewing threads to match fabrics
Rotary cutter, ruler and mat
General sewing supplies
Fabric marker (or tailor’s chalk)
Getting started:
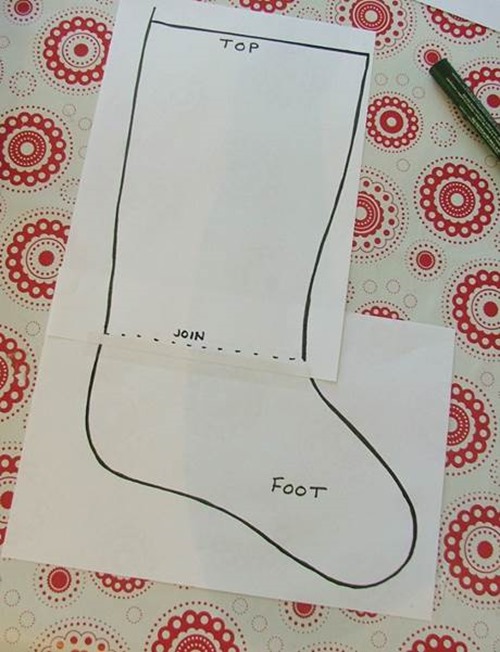
Print the two stocking templates from here. Match the templates at the join and cello-tape in place. Cut out template on the outline.
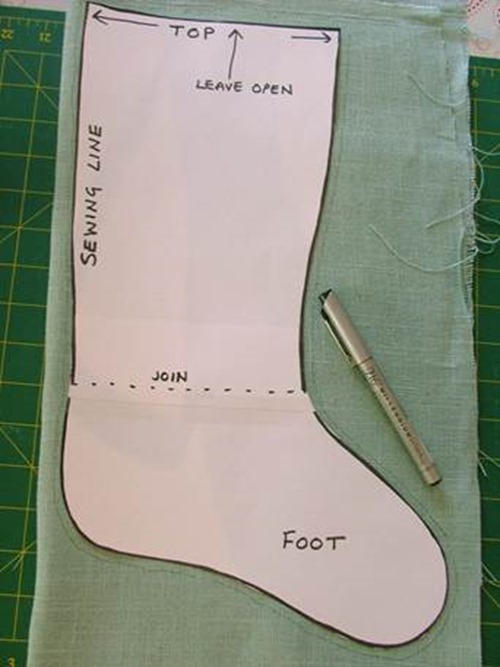
Fold the linen fabric in half along its longest edge and position the template on top, leaving a ½in gap around it. Trace around the template with the fabric marker and cut out ¼in outside of traced lines.
Place the template on top of the batting and trace once. Cut out directly on traced line. Now place the pattern on reverse and repeat this process one more time. Set the batting shapes aside.

Fold the napkin in half on the diagonal with wrong sides together. Fold under each pointed end so they are of equal length. 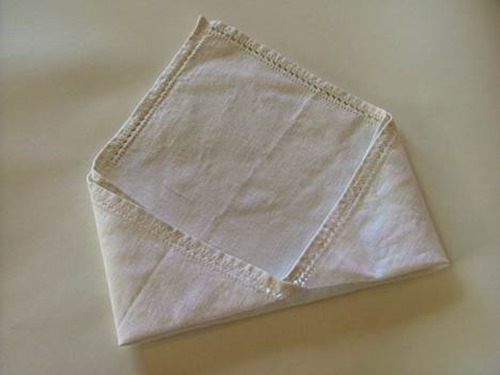
Ensure that the top edge of the napkin is approx. one inch longer than the top edge of your linen stocking shape. Finger press.
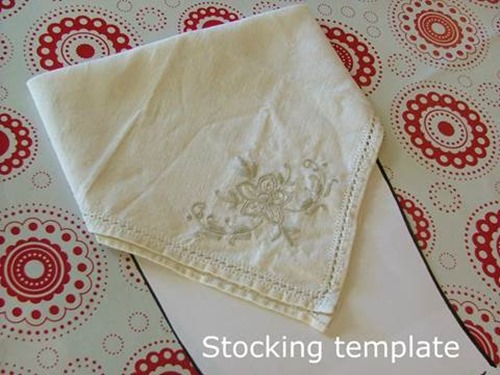
Unfold the two sides of the napkin and place on the cutting mat with the top folded edge parallel to one of the lines on the mat. Now make a vertical cut ¼in out from the finger-pressed line you made on the right-hand side of the napkin. Repeat this process for the left-hand side of the napkin.

Cut ¼in IN from the top long edge.
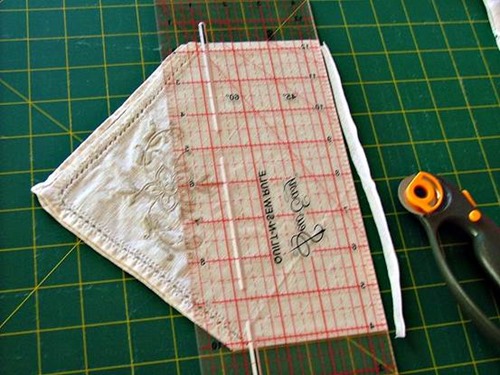
You will now have two pieces of napkin for the top front and back of your Christmas stocking! Set them aside for the time being because now we’re going to cut the remainder of the napkin and use (almost) every little bit of it!
Unfold one of the leftover triangles and place it on the cutting mat. Cut down the middle to yield two smaller triangles of equal size.
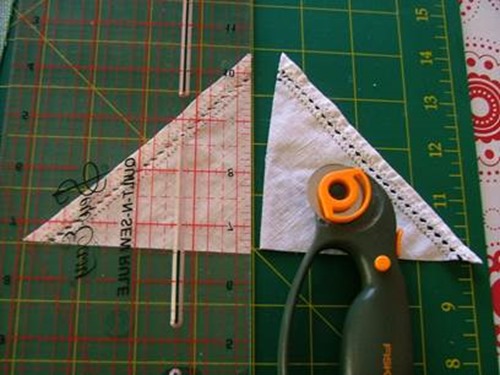
These triangles will decorate the heel and toe of the stocking.
Take the remaining folded triangle and, keeping it folded, place it on the mat and cut ½in IN from the lacy edge.
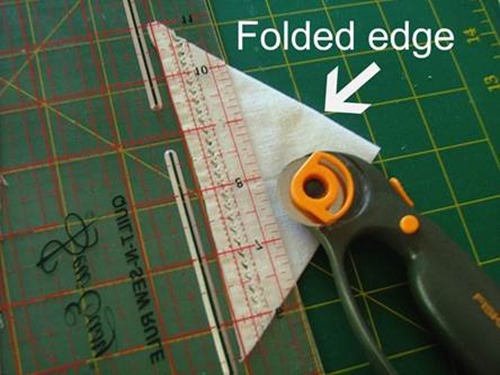
Open out the corner piece and discard the smaller fabric triangle. Turn over the raw edge by ¼in, and pin. Clip ¼in IN to the corner.
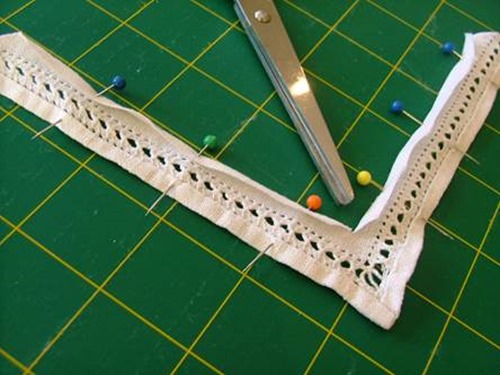
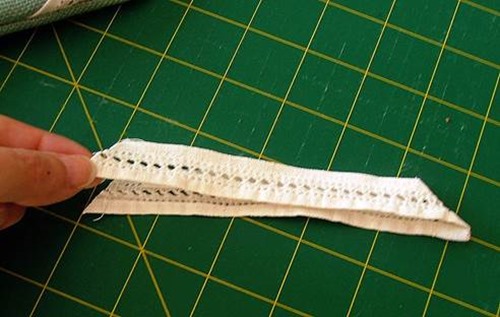
Sew a line of stitching along the folded edges to create a neat seam. Then fold the fabric back over on itself with wrong sides together. This will become the stocking hanger.
Putting the stocking together:
Position one batting stocking shape centrally on to one linen stocking shape. The linen shape will be marginally bigger than the batting. Pin around all edges to keep in place. Repeat with the other stocking shapes.
Decide which way you would like the stocking to face – with the toe pointing to either the left or the right. If your napkin has an embroidered motif on it, ensure that this piece is ear-marked to be stitched to the front of the stocking.
To do this; place the napkin piece right side down along the top edge on the wrong side of the stocking:

The napkin piece will be longer than the top edge of the stocking as intended. Ensure it has equal lengths overhanging each side and then pin in place.
Sew along the top edge using a ½in seam allowance. Repeat this process for the other side of the stocking and the remaining napkin fabric piece.
To add the heel and toe patches:
Position one of the small napkin triangles right side up on to the front right side of the stocking toe. Turn the stocking shape over and trace around the toe, then cut out on traced lines.
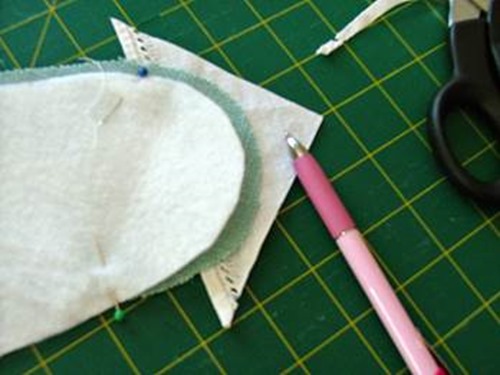
Sew the napkin toe piece in one straight line to attach it to the stocking shape.

Repeat this same process to create the heel patch on the front side of the stocking.
Place the two stocking shapes right sides together and pin around the edge, leaving the attached napkin pieces on the top edge untouched.
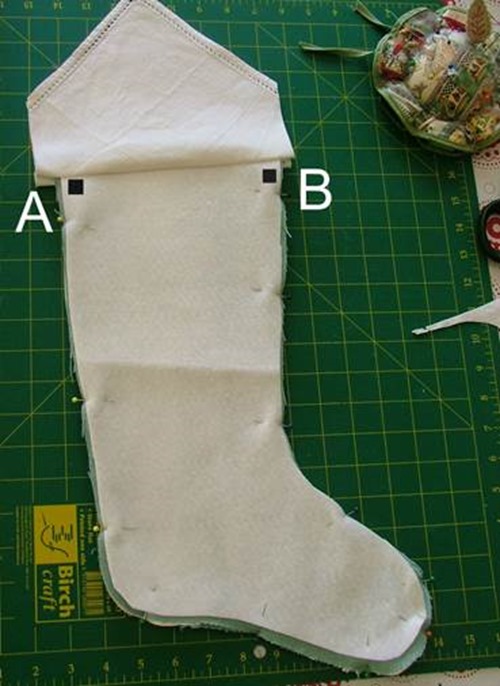
Sew around the stocking shape from point A to point B using a ½in seam allowance.
Clip curves and turn the stocking right side out. Use a chopstick to ease out the curved edges.
Now place the top napkin edges right sides together with raw (side) edges matching.
Position the ‘hanger’ in the seam on the side of the napkin that is parallel to the heel. Ensure that raw edges are matching, then pin in place.
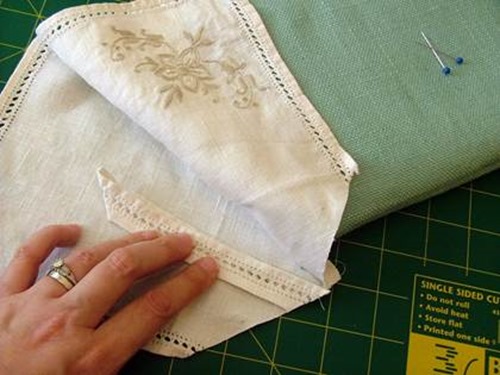
Sew down each side, from A to B, using a ¼in seam allowance.
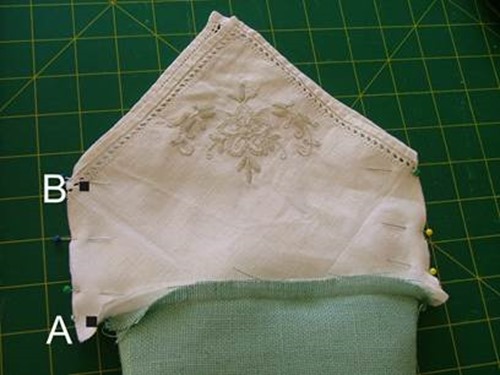
Turn the top napkin part of the stocking over to face the right side and give it a gentle press with a warm iron.
To complete the stocking, sew one of the rustic bells to the pointy end of the napkin on each side. You are done!
If you want to go a step further and embellish or personalise the stocking, here are a couple of ideas!
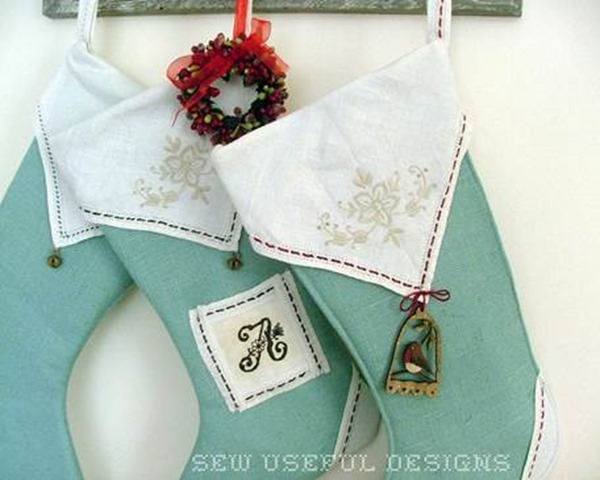
Do you have any special Christmas buttons in your stash?
I attached this gorgeous red robin button designed by Barb Smith at Theodora Cleave, with red DMC thread that coordinates with the bird. I then used the same thread (all six strands) to thread through the lace on all areas of the napkin.
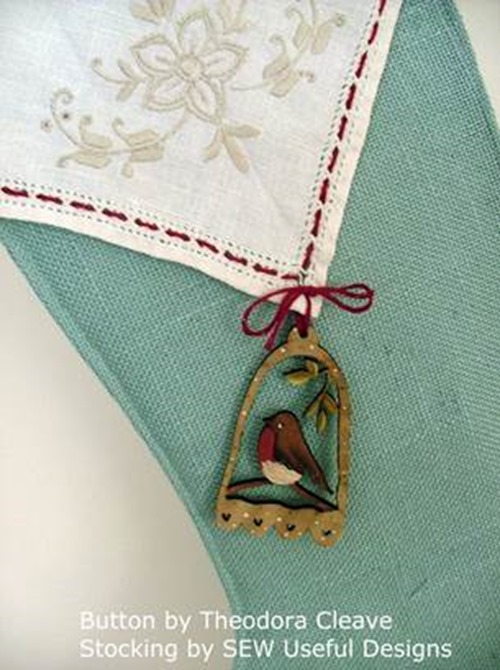
I top-stitched this version of the stocking which gives it a much more defined shape and encloses the raw seams on the inside.
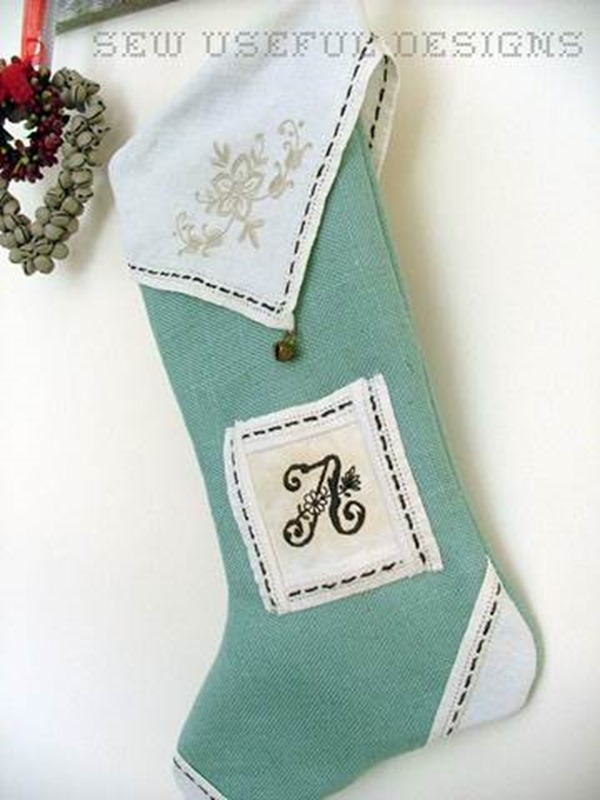
With this next stocking I personalised it with a monogram of my friend’s name. I had another napkin the same as the first, traced my chosen monogram on to the right side and adhered a stabiliser to the reverse. After satin-stitching the design in a charcoal coloured DMC thread, I trimmed it square and sewed four cut strips of the remaining napkin lace to each side. To finish it was slip-stitched on to the front of the stocking, and then I threaded the same colour DMC thread through all of the lace sections. This takes a few extra hours to do but its well worth it if you have the time!
Well I really hope you enjoyed my tutorial! It has been an absolute pleasure to share some Christmas magic with you in the middle of the calendar year!!
Till next time!
Vikki xo
